
Installing a userscript manager
From my experience:
| For this OS: | For this browser: | Use: |
|---|---|---|
| Laptop OS | Chromium based | Tampermonkey |
| Laptop OS | Mozilla based | Violentmonkey |
| Android | Firefox Nightly(only) | Tampermonkey (only) |
Tampermonkey Laptop OS Installation URLs
Tampermonkey is the successor to Greasemonkey. Here are the direct installation URLs:
| Browser | URL |
|---|---|
| Chrome | Chrome Web Store |
| Opera | Opera Addons Page |
| Edge | Edge Web Store |
| Safari | Apple Store |
Violentmonkey
Violentmonkey is the main alternative to Tampermonkey, and is completely open source. It's available for Firefox, Chrome, Opera and Maxthon. You can install it from here.
Greasemonkey
Greasemonkey is the original userscript manager. Following Firefox 57, and starting from the version Greasemonkey 4, the extension changed its API to be compatible with the Browser Extension API, and no longer support scripts written using the older GM_ synchronous API .
I discourage using it at the moment because the majority of userscripts are written using the older API and the other userscript managers don't support the new asynchronous API.
You will have to install it only if a userscript you want to add is written specifically using the new GM. asynchronous API and doesn't have a polyfill to support the older API (very rarely).
Searching for userscripts
The majority of userscripts are now hosted either on openuserjs.org or greasyfork.org. Userscripts.org has been deprecated.
OpenUserJS
The following example illustrates how to search for a userscript on OpenUserJS and install it on Google Chrome with Tampermonkey:
- Navigate to the home page
- Enter the keywords into the
Search Userscriptstext input: can be the target website name, the desired feature, etc. For example, let's search for a Google userscript - Open the script page you want to install, for example
Endless Google - If the script's description is corresponding to the features you are searching for, install the script by clicking the
Installbutton - Confirm the installation by clicking
Install - The userscript can now be tested by opening or reloading the target website
GreasyFork
Firefox with Violentmonkey is used in the next steps:
- Navigate to the Scripts page
- Enter the keywords into the
Search scriptstext input: can be the target website name, the desired feature, etc. For example, let's search for a Feedly userscript - Open the script page you want to install, for example
Feedly filtering and sorting - If the script's description is corresponding to the features you are searching for, install the script by clicking the
Install this scriptbutton - Confirm the installation
- The userscript can now be tested by opening or reloading the target website
How to use Tampermonkey on Android Devices
Wysłane przez Nux, 2021-03-14 19:39Installing extensions from a custom collection
- Install Firefox for Android. This currently only works with Firefox Nightly.
- Open Firefox and choose: Menu (dots) -> Settings -> About Firefox (at the bottom).
- Tap the Firefox Browser logo 5 times. This will enable developer mode. Yes, this is the key to it that you would have had to google forever to find. 🙂
- Now go back to the menu and in the "Advanced" section choose "Custom Add-on collection".
- You now have access to my collection. User ID:
3753384. Collection:NuxFavs. - The browser will shut down to apply the changes. Reopen it to access the collection.
That's it. You will be able to install Tampermonkey and other add-ons I tested. You will see the list in standard "Add-ons" menu.
What works
You can install any extension from my NuxFavs collection. I Tested all of them.
Creating your own custom collection
Please see Mozilla's blog post on expanded extension support. Note that when you experiment, you might need to create a new collection to update the list. At least this is how it worked the last time I tried – the name of the collection had to be modified for the list to be refreshed.
Why is Fuckle (I mean Google) making this so hard?
In a word...security. And money.
Userscript Execution and Development
To understand how to run and/or write a Userscript, you have to understand the following:
- Userscripts are executed as event handlers by the userscript manager. It's what experienced developers would call the event sink. You cannot just 'run' a userscript like a command or something, you have to set the @match command to tell Tampermonkey or Violentmonkey which URL you want the script to run on. The @match command value supports wildcards, so you can be as specific or as general as you wish. When a URL is fetched into the browser, Tampermonkey or Violentmonkey will detect the URL and run the script, if it is activated.
- The @ commands must be commented out. That's how they are initialized.
- Userscripts have just as much access to the underlying DOM and can do anything that the javascript in the page, if any, does.
Includes and Excludes
The @include command is another way to set the web pages where the script will run. @include supports regular expressions, but @match is safer. The @exclude command sets the pages that the script shouldn't run on.
Even though the userscript already defines includes and excludes in its metadata, they can be overwritten using the userscript manager.
Tampermonkey
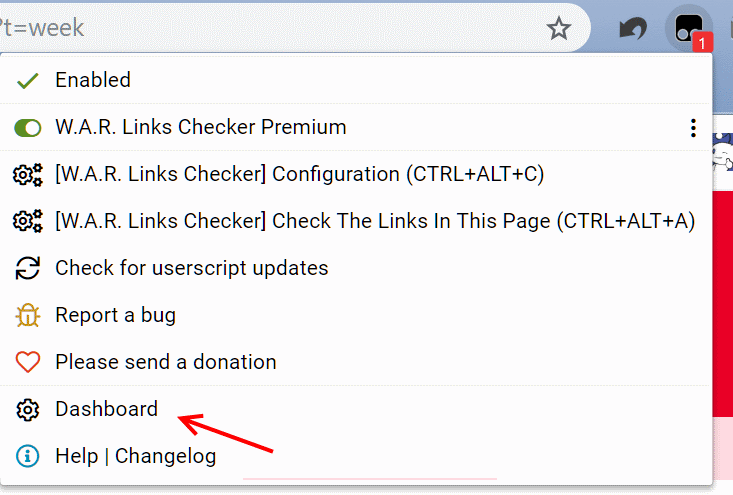
-
Open the Dashboard by clicking on the Tampermonkey button and selecting
Dashboard:
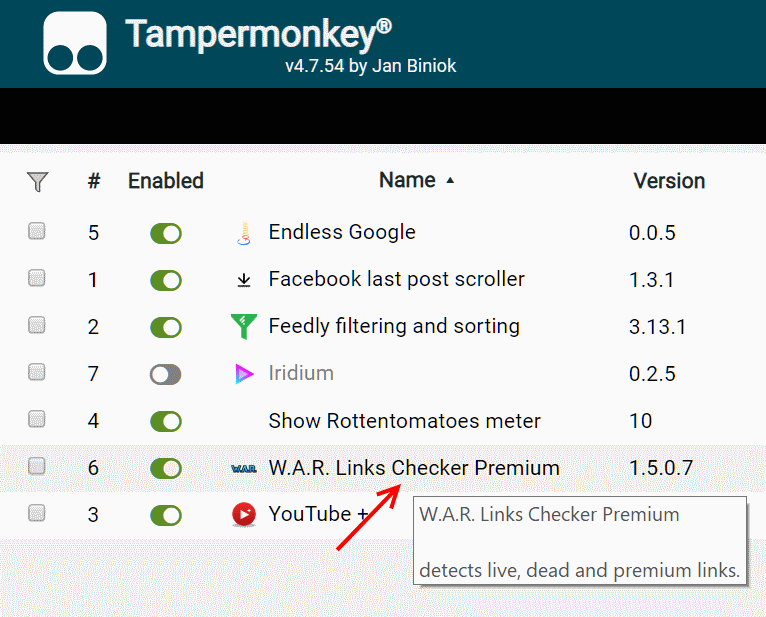
-
Click on the userscript you want to configure:
-
Switch to the
Settingstab. You can now add additional includes, matches and excludes. You can also disable the original includes and excludes:

Violentmonkey
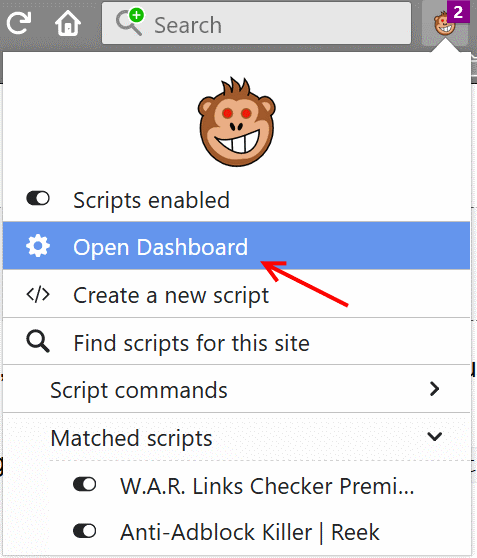
-
Open the Dashboard by clicking on the Violentmonkey button and selecting
Open Dashboard:
-
Click on the edit button next to the userscript you want to configure:

-
Switch to the
Settingstab. You can now add additional includes, matches and excludes. You can also disable the original includes and excludes:

Using the API and adding external libraries
If you want to use the GM_* API, you must declare a @grant header in the @command metadata, followed by the API function name (such as GM_getValue, GM_setValue, etc.)
Third-party libraries can be added by defining the @require header followed by the library URL. For example:
Userscript idioms and commonly used code snippets
- Query and remove a page element (the one you use for ADS):
- Store an object:
- Retrieve an object:
- Replace the current URL and redirect the page:
- Add a button to execute some function on the page:
- Append a style to the page:
- Fetching and parsing an external page:
A sample project
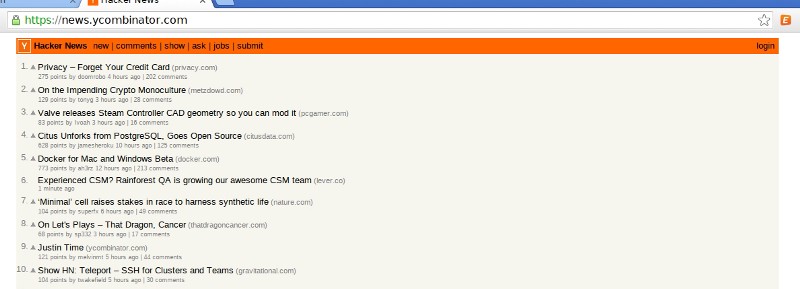
We are going to be making a slight change to the home page on Hacker News http://news.ycombinator.com.
We will be using jQuery to make alternating links background colors slightly different to improve readability.
Start a new script
Open either Tampermonkey or Violentmonkey (depending on your OS and browser) and select ‘Add a new script’.
You should be brought to a new tab that looks like this:

Fill in the information
After starting a new script, the first thing we want to do is edit the command metadata at the top.
Add jQuery
We will need jQuery for this project, so we 'include' it with a @require command:
          // ==/UserScript==
          // @require http://code.jquery.com/jquery-latest.js
Replace the //your code here line with the following code:
$(document).ready(function() { alert('WINNING');});and enter Ctrl + s or click on the save button on the left.
You may be brought to the following page. If not, click on the Installed userscripts tab.

Awesome! Our script is loaded into the userscript manager. The green dot on the left means that the script is active. You can even see the Hacker News logo in the screenshot.
Execute the script
Visit Hacker News in your browser and if you’ve been following along and everything went well, you should see something like:

Fire up the debugger
It’s time to find the post elements we want to modify. Enter Ctrl + Shift + i to bring up the browser debugger.
Now we want to select an element to take a closer look. Clicking on the blue square with the mouse in it at the top left of the debugger will open the element selector. You can also use the key command Ctrl + Shift + c.

As you can see, we found an element called td.title. After clicking on it the element is highlighted in the elements tab of the debugger (also shown above.)
Highlighting the element above our title called:
<tr class="athing">
selects this in the browser:

Bingo. It looks like we found the element we want. Hacker News has a clean HTML layout so it wasn’t too difficult to find our target element.
If you remember your jQuery, all you have to do to find all of the post elements is use the selector
$('.athing')
Do something to our post element
Now that we have a way to select our element with jQuery we can alter our element. Let’s change the background color of the posts using the following code. Change the $(document).ready() code to this:
$(document).ready(function() { $('.athing').css('background-color', '#DDD');});
Let’s look at the resulting page. Remember to save your userscript then refresh the HackerNews page. You may have to close your debugger to view the whole page.

Are we done yet? Not quite. We have changed all of our post elements instead of alternating. It may look like the zebra effect we wanted but that’s only because the score/subinfo element isn’t effected.
jQuery to the rescue
Have no fear, fellow Campers. jQuery has come to the rescue yet again.
jQuery provides special selectors just for an occasion like this.
Now introducing :odd
:odd Selector
Description: Selects odd elements, zero-indexed. See also even. In particular, note that the 0-based indexing means…api.jquery.com
All we have to do is add :odd to the end of our selector so that the line looks like this. note: I have also changed the color to #EEE; to blend in better.
$(‘.athing:odd’).css(‘background-color’, ‘#EEE’);
Save your script and refresh HackerNews and you should see something like this:

More reading
GreaseSpot Wiki
GreaseSpot is community documentation for user scripting with Greasemonkey.wiki.greasespot.net